Showing posts with label props. Show all posts

Saturday, August 16, 2014

Javert's Sword - Les Mis 2012 Movie

Hello! It's been quite some time since I've posted. There's a lot that's happened between my last update and this one, but hey, here's something new! Javert's sword from the 2012 Les Mis Movie! This presented an interesting challenge as to get the level of detail, wood seemed the easiest option, but it was a chance to finally get into lathe work!


Here are the initial drawing from the imagery I was given to start with. I found soft but knot-free wood to work with, doodled, my usual beginnings!


This was my very first attempt to create the hilt with the lathe. I ended up thinning down the handle itself quite a bit over time, but for a first attempt at all with a lathe, I was pleased!


This was my 'pattern' to carve out the detail in the pommel of the sword.

 You can see my idea which is to use the bottom of the hilt to sit in the center of the guard to give everything support. My other idea was to have a metal shaft go through up into the hilt, through the guard, and into the sword.

Detail of the carving of the pommel.
 
 Carved out the hand-guard! This... took at least six tries to get the shape and the carve correct and that bit at the top! So frustrating, that bit! It had to sit against the pommel and neatly curve down to the bottom.


Which you can see here! I leveled it out with the band that would sit on top of the guard at the base of the hilt.


Now the guard is carved out along with the base of the guard...


Let me tell you - that blade. It proved to be a bigger challenge than expected. I originally wanted to make it out of plastic (Sintra) but the attempts were... terrible. So it ended up being out of wood as well. Cut a square wooden dowel at an angle and ground forever until it was properly sized, then sanded the whole thing down to a point and so the edges weren't sharp (or ugly).


So this wire! Well, cord. It's metallic cord. It took some serious hunting to find this. There's two ways the sword itself could be wrapped and from all available photos, it could be either - silver wire wrapped or silver cord wrapped. I went with cord as it's easier on the hand in the end and this particularly one looked so wire like I was quite pleased!


So this is a dual picture... it shows the very carefully done hilt wrapping process - glue smeared over the wood then very slowly and carefully wind it up, pushing down to keep the pressure and tension up. My hands were super sore by the end but I'm super pleased with the result!

...The 'dual' part is that this spray paint. Let me tell you something - there was nothing on the cap that indicated this would be a sparkly spray paint. NOTHING. It wasn't sparkly when wet, either. ...It's now jokingly called 'Cullen Killer' because it sparkles like a twilight vampire. Grumble. So... everything required a second coat of spray paint. Why spray paint? Because it's a more even coating and there's no brush strokes left behind.

Another mention is that I used a two part epoxy for this glueing and I'm REALLY pleased with the results. It dries painfully quickly but the bond is solid as a rock in only about two minutes! I shall be using in the future!


 (Drying...!)


Here is the final product. Please ignore the disaster my basement is - I snapped the final pictures after staring to rip everything apart to clean from all the wood dust! I'm quite pleased with the end of it all. I wish I could have found a different color of spray paint (again) but nothing seemed to be the white-silver shade of silver I needed, and I should have weathered it properly, but still, pleased. Always feel like there's something left at the very end I wanted to do more of but I think no matter what it would always be like that.

Thanks for checking this out!


Sunday, October 21, 2012

Travis' Beam Katana: Part 2

When we last left off, I had several pieces put together and crafted and... not much looking like a katana.

You can see the sides of the trigger-box I made. I wish I had more shots than just this one because this little box was hell. To get it to that incredibly strange shape of the curved smooth edge of the metal cup, along the flat of the metal piece under it, then along the ridges of the part that should screw into something else was insane. It took many, many hours of carefully carving, recarving, some clay, baking it in the oven, recarving, then more clay and it was just insane. It turned out beautiful though in my opinion - you'll see it better later.

I realized that I had to put a notch in the metal cup or the wires to the trigger couldn't get into the box for the trigger. Little work with a dremel later (and managing not to set anything on fire with all the sparks) I had this notch. Very sharp edged though - I had to use heat shrink rubber to protect the wires so they didn't get cut through over time.


Here where all of the pieces after being painted for a first layer. I found a white-pearl-metallic paint that replicated what I was seeing in the picture of the prop, and I was quite pleased. What sucked was that in the end every piece needed MANY coats of this stuff to get them properly coated and matching each other.


Here is the entire lot of 'stuff' that it took to make the katana. You can see the battery pack (now with longer wires to make it up through the hilt), the rods that go along the outside, and some internal pieces that blocked the original saber from going up or down further than it should.


Here was the hilt being put together - just after all of the electronics were, with incredible difficultly, managed to be put in the small part of the hilt between the bottom of the lower metal cup and the thinnest part in the middle of the hilt. It wasn't easy. It just BARELY fits. Very, very barely.

 
The top and bottom of the katana - attached, finished, and painted... and here are the whole pictures.

This was after a bit more paint touching up - making sure the paint was as perfect as possible. Specially the red circles around the top of the katana - they were tough! I finally went at them with a paintbrush only a few hairs wide!

As always - I give a wrap up. Honestly? I'm super pleased with this prop. The only small faults I have are that it isn't smooth everywhere as metal should be but considering this is all hand cut, somehow managed together, and painted up as it never should have been?  I think it turned out very well. It can be waved around quite successfully even though it looks very delicate. I mean it isn't going to survive hitting someone, but it can survive a con I'm fairly sure.

The client - who lives close enough to have watched it all come together - is incredibly happy with it. I'll be posting a shot of her with the katana soon - in fact I have two other clients who were kind enough to send me shots of them and their props while they were in full costume! I'll do a little non-tutorial post for them.

Wednesday, September 19, 2012

Travis' Beam Katana: Part 1

First off, I'm not gone from the world of prop making. I started a new job and moved a few hours from where I used to live and am in a smaller place, so my projects will be smaller until I get myself a new place! So now that I'm more settled in, I have something new to show you all.

A close friend of mine asked for a commission of Travis' Beam Katana, Tsubaki form, from the game No More Heroes. Almost instantly I could see this would be an interesting challenge. I have very little experience with electronics, but this has to light up and handle some swinging around. I don't have a lathe, damn, to do that middle part. So I had to improvise. :3


Please excuse my kitten. He's a nosey bugger. So, a very particular light saber became my base prop. They run about $30 dollars and finding the blue ones are annoying. This one was definitely my choice as the 'blade' is exactly what I need. Now let me tell you something. There are about 8000 screws holding that damn hilt together and if you mess up, you are going to pull a connection out. No, seriously. The wiring job on this saber is bullshit. It's such crap that it will just fall apart.
If you get the hilt apart successfully, this is what you'll find. Those green wires went to the sound box but since it wasn't needed, I just got rid of it. You can see the black wire and orange wire going to the battery pack. First issue discovered: no way was this original battery pack going to work. I was going to have to hook in something smaller. Quick trip to my local radio shack found this:


 A quad of triple AAA batteries became the new power pack - awesome. Even so, it just barely fit into a decent sized hilt which is a little thick but will have to do. So like I said, with no lathe, I had to make do. I went to the nearest hardware store and two hours later and a lot of futzing, I had the following pile: (And the hilt is PVC I cut).

Most of it is plumbing or electric pieces. The black caps I found in the hardware section. So I began to piece things together:
This was the first attempt at the hilt. It wasn't perfect and a lot of work needed to be done, but most importantly of all, the whole thing had to be hollow. Wires need to run up into the blade and down into the PVC hilt where the battery pack will sit. The battery pack must be accessible. The button to turn the light saber on must be accessible.

You can see here the plastic piece I used to make the 'holders' on each end of the two bars that run the length of the blade. I used a nail heated on the stove to punch the initial holes then drilled straight through the soft plastic - the fit was perfect. No wiggling.
Here you can see that I rounded the edges of the plastic bit so they'll sit snug against the silver cup it rests against. Also you can see the 'H' I had to build. These are two steel bracers and a piece of the cut rods - there's an H at either end of the rods. I think they're meant to be bracing the rods but instead they are really just annoying - but if you've been following this blog at all you know I try to get pieces as accurate as possible.

One of the two cups that cup the bottom and top of the blade. These are some sort of plumbing piece cut with bolt cutters and bent inward. Now my first problem came up that 1) the spaces that stuck up had to be big enough to look right with the plastic pieces I bought and 2) look the right size with the trigger piece I would be making. Thus I think I ended up one short - 4 instead of 5 - but I'm pleased with the sizing.
These are the two bars with their plastic end caps and H spaces. I'm quiet pleased with it. You can see how they sit against the Cups in the next pic:
I have to clean up some of the glue on the H bracket, and you can see the Hilt... more of it in the next shot.
Here you can see the whole hilt built up. The entire thing is hollow and has inner support from how it links together. There is also a whole hidden bit inside that cups the bottom of the plastic saber so it sits at the right depth. The screw-piece in the middle (the thinnest part) had to be shortened some from its original length. Try to imagine everything painted the same color instead of looking so different!
Here is just the beginning of the trigger for the blade. Let me tell you something - I spent three hours between three different stores trying to find something that matched that gold button in the middle. See, here's the issue. There is a very specific triggering mechanism attached to all the wiring for the blade. The gold button you see is designed to hit that trigger perfectly. It's also about the right size and shape to match the trigger in the picture but a little bigger - oh well. So I had to find something to be the casing for it. In the end - I had to build it myself. I'm still in the process - a lot of time hand carving this wood to be the right shape to 1) curve 2) fit the button 3) fit against the metal underneath it.
And the last picture for now, the top of the katana. It's a recycled umbrella tip. Now someone's going to say the picture at the beginning of this is really pointy so the tip here isn't right. No, it's not. The problem is simple - it has to be con safe. If it was metal and had that super pointy tip, con safety would never let it slide. If it's anything but metal, it could snap or break if any weight gets put on the tip. So I spoke with my client and we agreed this would work best.

So there's all the work so far. There's still a lot to do. The casing for the trigger has to finished being made and the button has to sit right. All the wiring has to be gone over to make sure its going to hold up. Wiring has to be run through the hilt and glued into place. Have to cut a hole in the bottom cup and soften the metal edges so the wires can run through it and not be cut over time. Get the trigger installed fully. The hilt has to be glued/sodered/melded/etc together so it's one solid piece with the wiring as it should be - the battery pack will sit in the bottom of the hilt on the end cap. The plastic bits on the rod have to be secured to the upper cup first, make sure it's all balanced right on the top of the saber, then glue the top of the saber into place inside the upper cup and finally, get the bottom plastic bit glued onto the metal cup.

Oh yea, nothing much. -.-

Thursday, May 27, 2010

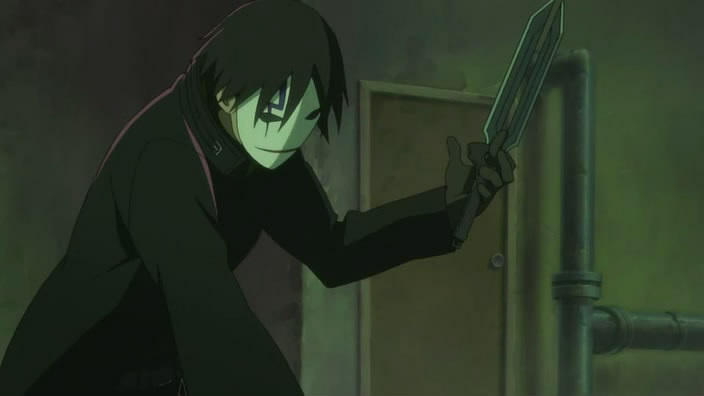
Hei's Daggers - Darker Than Black: Part 1

Using two (1, 2) reference pictures I discovered, I came across the achingly familiar problem with cosplay prop design: no two stills are ever alike. The proportions change, the shape changes, the design changes, the color changes, everything changes depending on the creator's flight of fancy and level of detail needed for the scene. So as usual, it came down to eyeballing things. In this case, I realized that the daggers must be slightly longer than the character's arm from inner elbow to his fingertips. Having gotten that length from my client's arm, I had something to work with.

The basic proportions, have some almost painful work, ended up being roughly that the blade was 3/4 again as long as the hilt+guard. So Hilt+Guard = 7.5in, Blade = 12.5 for a 20 inch dagger. The proportions were not fun to do and took me a few hours to manage. Oh who am I kidding, I love figuring out the math. What I do not like doing is trying to measure things from an image on my screen. I also went about measuring the broadsword I have in my closet to find out the width of a comfortable hilt as well as the proportion of the blade to the hilt. You can tell from the pictures that the hilt is thinner than the blades, but thicker than the gap between them, and the guard is wider than the blades. I am pleased with the way the design ended up coming out.


Next up is cutting out the design from the cardboard (got client approval for the design late last night) and tracing it out onto foam. Then begins the part of prop design that always ends with aching hands and sore wrists... cutting and sanding.